# Carousel Settings
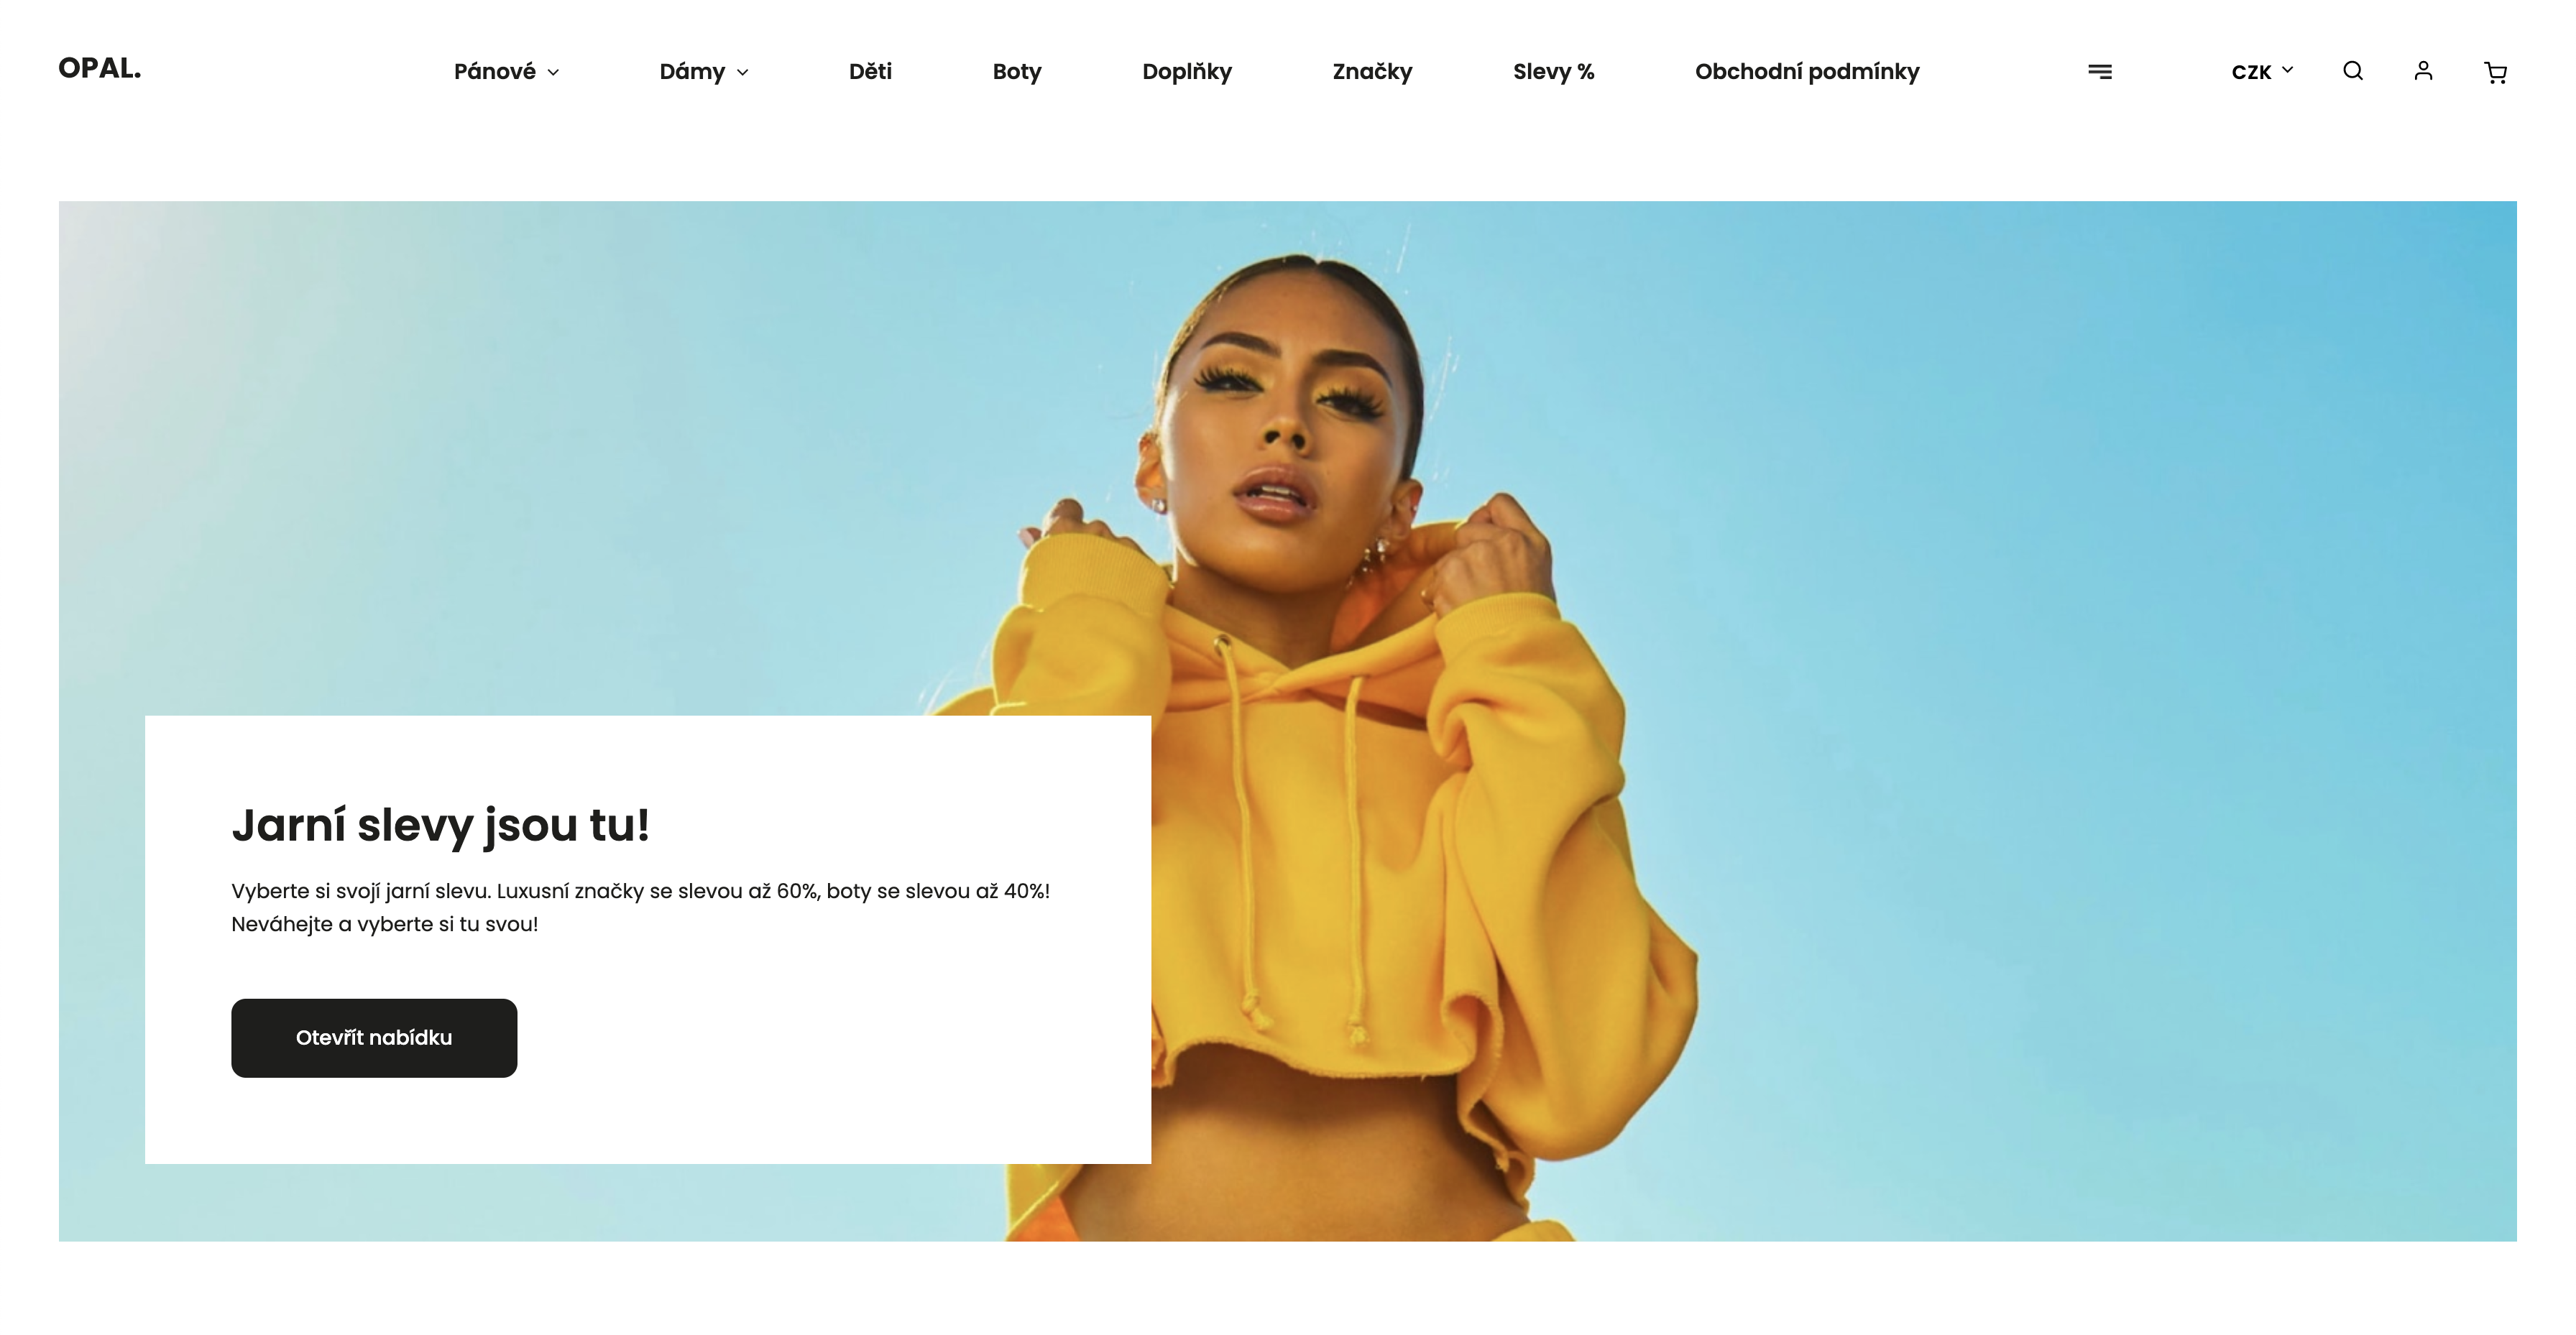
By main banner we mean the one that appears first when you arrive at our e-shop and the one that has the largest dimensions.
Before we start with the specific steps, let's look at the code that we will enter into the administration.
<div class="carousel-slide-box">
    <img src="https://cdn.myshoptet.com/usr/shoptet.tomashlad.eu/user/documents/extras/opal/img/slide1.png?v5">
    <div class="carousel-slide-caption">
        <h2>Replace with Headline</h2>
        <p>Replace with description</p>
        <a href="#" class="button">Replace with Button text</a>
    </div>
</div>
2
3
4
5
6
7
8
# Shoptet Administration
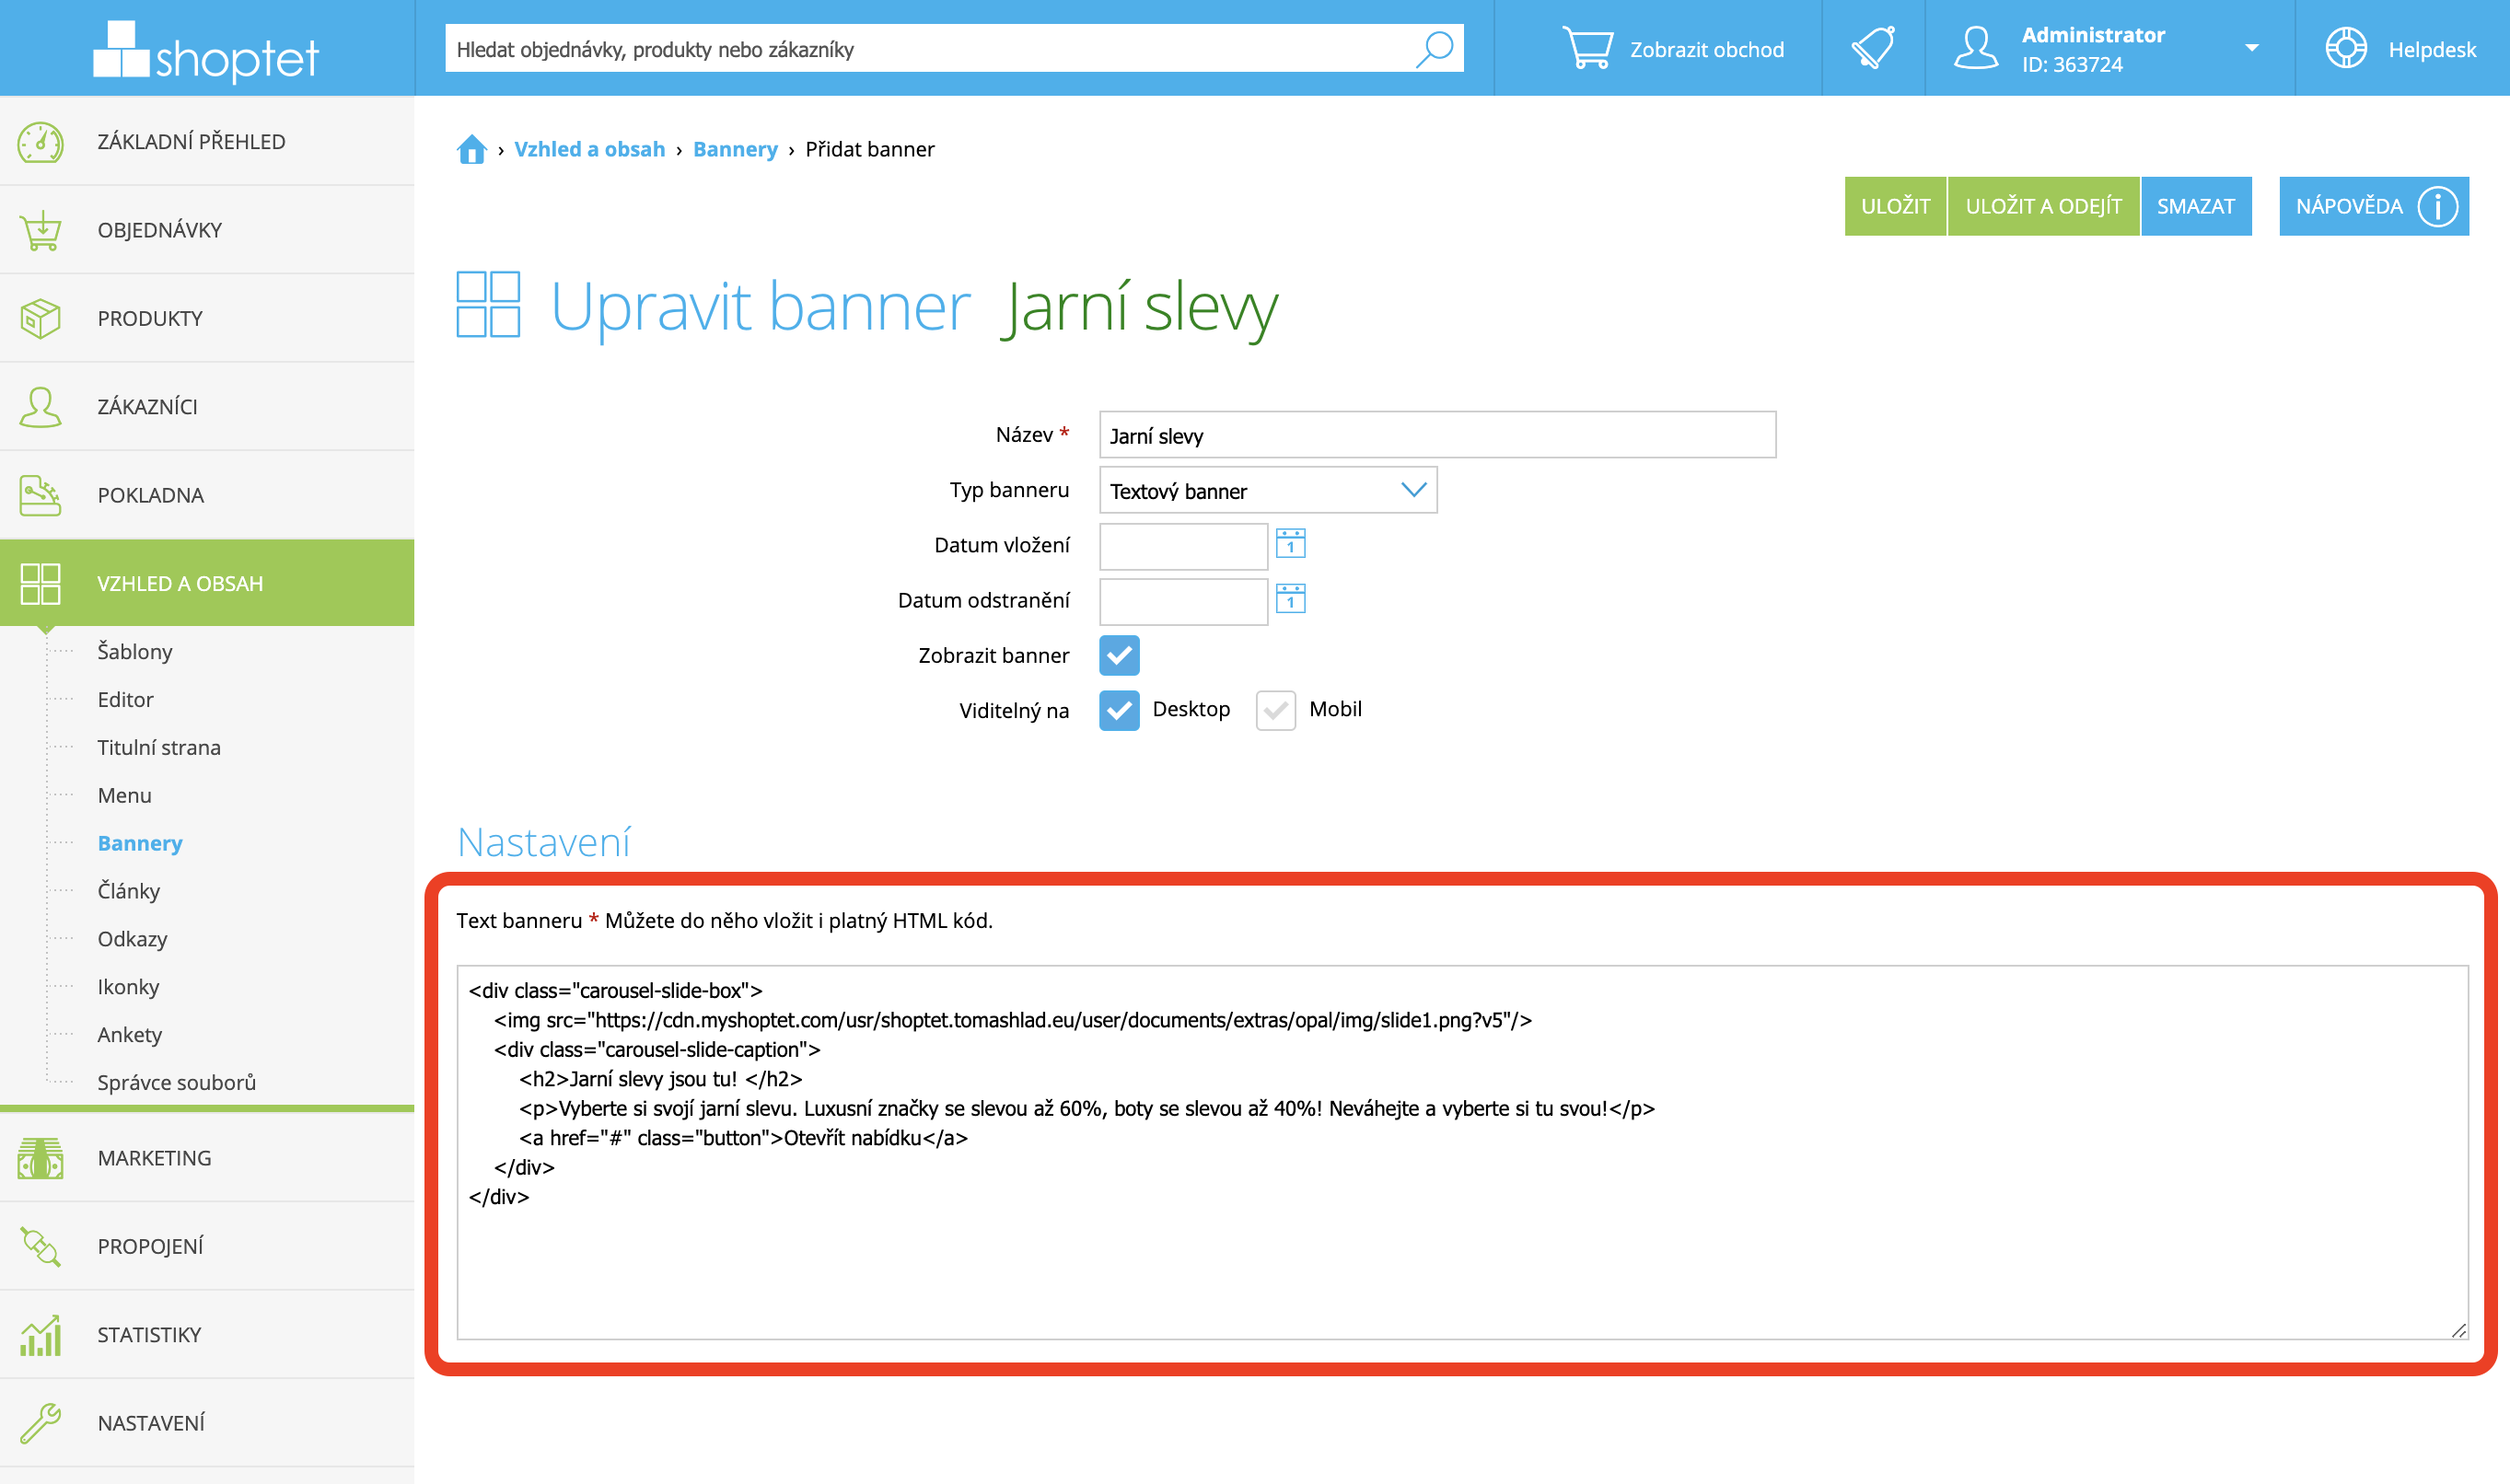
First of all, we will want to add the code to the appropriate place in our Shoptet administration. This place is located in the main menu of administration in category TEMPLATES > Banners > Carousel > Add carousel (if not added)
WARNING
It is important to check the visibility of all carousels that are on offer.
# Image
Now let's start replacing the code with ours! We will start from the first, ie from the picture, we will continue through the title, label to the button.
Let's look again at our code, which we will insert into the Shoptet administration.
<div class="carousel-slide-box">
    <img src="https://cdn.myshoptet.com/usr/shoptet.tomashlad.eu/user/documents/extras/opal/img/slide1.png?v5">
    <div class="carousel-slide-caption">
        <h2>Replace with Headline</h2>
        <p>Replace with description</p>
        <a href="#" class="button">Replace with Button text</a>
    </div>
</div>
2
3
4
5
6
7
8
First, we change the content after the text src in the<img>attribute and between the quotation marks, which represents the image that is in the background of the banner.
https://cdn.myshoptet.com/usr/shoptet.tomashlad.eu/user/documents/extras/opal/img/slide1.png?v5
This code needs to be replaced with the address of the image you want in place. You can get this address either by overwriting it from your FTP, or by right-clicking on an image on the web and copying the image address.
TIP
Not sure how to get the image address? Does not matter! In the instructions Generating image URL we will guide you through the whole process.
# Headline and description
The title and text do not differ in any way from changing the image, however, we replace other attributes as follows.
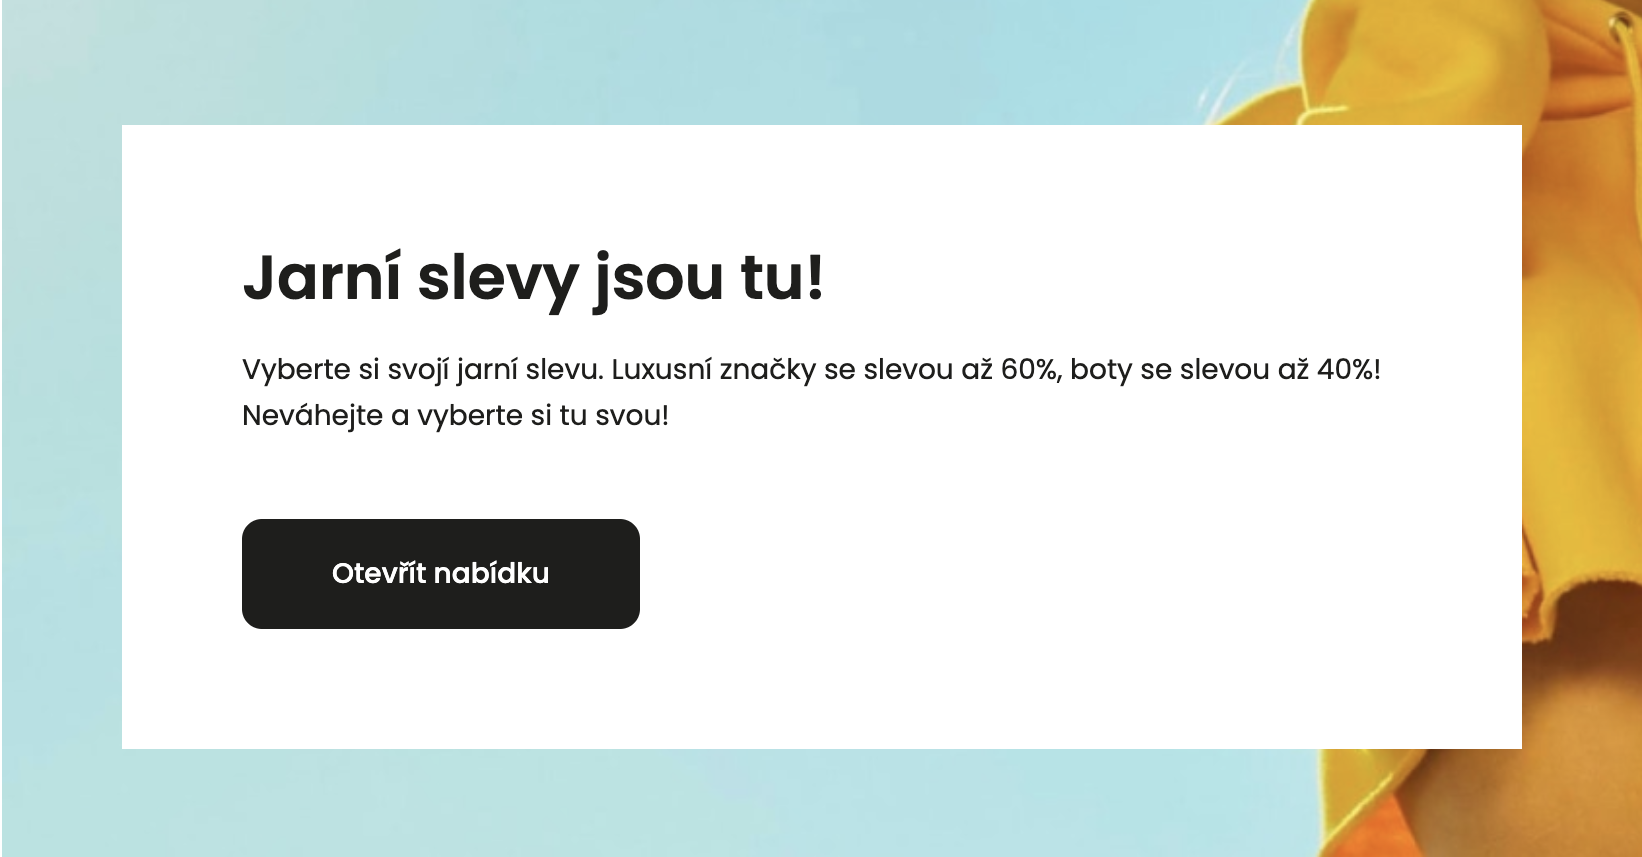
Replacing the text is easier, as we can orient ourselves according to the already copied text, namely Replace with Headline andReplace with description in the attributes <h2> and <p>
<h2>Replace with Headline</h2>
<p>Replace with Headline</p>
2
You can replace this text with any text that fits a specific banner. We recommend that you do not extend the length of the heading, as short and clear text is more appealing to users than long headings.
# Button
The last step will be basically primitive after the previous ones. We work with the same elements as in the previous corks, so it should work out.
Let's look at the notch of the content between the href quotes in the<a>attribute, which represents the link / address to which the button will point. At this time, we only have the # hashtag filled in.
href="#"
We will replace this hashtag with the address to which we want the banner button to point. If it is aimed at a discount or product on your e-shop, then just replace the # address of a specific product page or another.
The second part is the text that defines the text of the button in the banner. In our case, it is now Replace with Button text
<a href="#" class="button">Replace with Button text</a>
If we replace this text with any that will be specific to a particular button, the change will take effect.
TIP
TIP! Try our Code generator for banners! Just fill in the content fields and the code is ready to use.